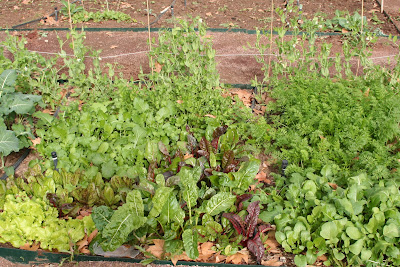
Wednesday, March 30, 2011

What do rocks have to do with plants?

For quite a few years now I have been fascinated by the effects rocks have on plants.  This might seem weird but rocks have major influences on soils which in turn influence plants.  Why you might ask?  Well it all has to do with rock texture.  Which probably leads you to another questions, what the heck is rock texture?  If you look closely at many rocks you can see particles, or crystals, that make up the larger rock.  Granite is a good example of a rock with obvious smaller crystals.

This is a close up of a granite counter top and clearly displays the different crystals present in the overall larger rock.  The entire image is granite rock, which is made up of black, white, and gray colored crystals.  The white crystals are quartz, the gray are feldspar, and the black are mica.  These crystals break off, or weather off, of the original rock to form sand for soil. 
These smaller crystals with time break off of the original rock to form particles that will turn into soil.  Water, chemicals, heat, cold, and so on all work together to weather, or break down, larger rocks into smaller crystals.  These larger rocks are known as parent materials and are most often in the form of bedrock or mountains.  Almost all of any given soil is made up of tiny weathered (or broken down) pieces of rock parent material.  So crystals or particles making up rocks are eventually broken down into soil.  The texture of any given rock corresponds to the texture of a soil.  For example, granite has a course texture and weathers into a course texture, or sandy, soil.  Other rocks such as basalt have a very fine texture and will weather into a very fine textured, or clay, soil.
Basalt has very tiny crystals that when weathered produce clay soils.  The crystals in basalt are so small they typically can not be seen.
 So rock texture determines soil texture, so what?  Soil texture then determines how much water a particular soil can hold.  Clay soils hold lots of water for a long time but absorb water very slowly.  While sandy soils absorb a lot of water very quickly but also dry out very fast.  Plants will colonize and grow best in the soils with textures that hold the right amount of water for them.

So how can you identify the soil parent material and what soil texture comes from it?
1. Find the most common type of rock at a particular location.
2. Looking closely at the rock, does it have larger or smaller crystals or particle sizes?
3. The larger the crystals/particles the more sandy the soil.  The smaller the crystals the more clay the soil will have.

The above rules generally hold true near mountains or where bedrock is close to the surface.  It does not hold true in a few cases.
1. If the predominate rock is limestone.  Limestone doesn't weather into soil particles, it rather is dissolved by water and washed away.  For this reason, limestone doesn't make soil texture like other rocks but certain types of soil will form from it.
2. If you are very close to a stream or river.  If you find lots of roundish rocks in the area, they are alluvial, or water, deposited.  In this case the soil will typically have a lot of clay.

If you find a lot of rocks in an area that look roundish like this you can know the area has alluvial, or water deposited, soil.
3. Areas with hardly any rocks are often wind or glacial soils.  Glacial soils will generally have a few very round rocks and occasionally very large round rocks.  These will also form special soil types but you can't use the rocks to identify the soil texture.  The Midwest is covered with these types of soils.

So using rocks can be very useful when trying to understand a habitat and determining how soil is influencing plants and animals.  In doing this the best book I have found in identifying rocks and their textures is "Smithsonian Handbooks: Rocks and Minerals".  This book has the clearest, most useful pictures of any rock and mineral book I have looked at.  It also has extremely useful information organized in a very easy to use and understand way.  One of my favorite features along with the great photos is the "grain size" information that goes along with each rock.  Grain size is the rock texture that we discussed above and fine grain size will result in fine clay soils, medium grain size a silt soil (half way between sand and clay), and a course grain size a sandy soil.


While this post discussed how to identify soils by looking at rocks I will have another post on how to identify soils directly by touch and later show how these things relate to the plant and animal life in a habitat.  Understanding and using rocks and soil textures are extremely useful when trying to find specific plants and even animals.  I personally have used rocks to help locate plants as well as places to find birds and animals.  But it works best for plants.

Thursday, March 24, 2011

Medicinal herbal tea: Stinging nettles


In the interest of the Stinging Nettles project I am working on a coworker gave me some organic nettle leaf tea from traditional medicinals to try out.  Being that stinging nettles are full of all kinds of medicinal chemicals it would be very logical to expect nettles to have medicinal benefits.  Some of these medicinal chemicals are anti-inflammatory and have been shown to reduce joint point and allergy symptoms.  Another compound called formic acid is a known anti-bacterial.  Serotonin a hormone associated with feelings of love and happiness is also found in nettle.  As a medicinal product however, Nettles are mostly commonly prescribed to alleviate environmental allergy symptoms.

So with this all in mind, along with my allergies, I have tested out this tea several times in the past few weeks.  First off, the tea is a sort of brownish color with a slight green tinge to it.  Taste wise I would say it is neither bad nor good, but definitely easy to drink with no overpowering flavors.  Also, no real aftertaste.  I tried several different steep times ranging from three to ten minutes.  Medicinally ten minutes is probably most beneficial.  As for medicinal results I would say it definitely helps with mild allergy symptoms most of the time and will partially alleviate more harsh allergies sometimes.  As for making me feel happy or in love anything like that I don't know...  This is just my own personal experience but it aligns with much of the scientific research on the effects of stinging nettles.

As with all wild foods such as stinging nettles make sure you have absolute positive identification of the plant.  Check and cross check with experts, books, and the internet.  In the case of prepackaged herbal teas you don't have to worry about identification, its already been done for you.  Once the plant has been positively identified taste a small amount and wait several hours to make sure you do not have an allergic reaction.  Then taste again and wait awhile, if you don't have an allergic reaction go ahead and try it.

Wednesday, March 23, 2011

Simple aquatic insect sampling

Plastic mesh bags like the one above can be filled with leaves and placed in a pond or stream in order to collect aquatic insect larva and nymphs. 

For a number of years now we have been assessing local aquatic insect populations through a rather simple plastic mesh bag method.  The mesh bag, which is slightly larger then a sandwich bag, is filled with leaves, the openings tied shut, and then sunk in a few feet of water.  The bag can be submerged in any type of body of water, whether moving or still, the important part is that you have the ability to retrieve it.  It doesn't have to be deep to produce good results.  Also, make sure you place adequate weight in the bag (a rock will do) so the bag doesn't flow away.  Once the bag is placed on the bottom of a body of water it becomes habitat for immature insects as they colonize it over a period of a few weeks.  After a few weeks the bag can be opened up and the bugs sorted out out from the leaves.

Directions:
1. Obtain a mesh bag of some type.  Mesh bags that onions come in will work well.
2. Cut the mesh bag down to a more manageable size.  If you end up with multiple openings you can simply tie them shut.
3. Fill the bag with dead leaves.  Be sure not to pack them in too tightly.
4. Place a rock in the bag and tie it shut with string.
5. Submerge the bag in a few feet of water at most.  It is important to have the ability to retrieve it.  If it is too deep you might have to swim to get it.
6. Leave the bag underwater for about two weeks.
7. After about two weeks, retrieve the bags, open them up and carefully sort through the leaves to find small aquatic insects.  When transporting the bags from the body of water to where the leaves will be sorted out be sure to keep the entire pack in water.  If the leaf packs dry out the insects will die.  To avoid this place your leaf pack in a one gallon plastic bag or a bucket that has enough water in it to submerge everything.

These leaves are the contents from one of our leaf packs.  The leaves are taken out of the pack and sorted out carefully in trays or bowls filled with water from where the leaves were submerged.  Using a magnifying  glass, tweezers, spoons, and cheep paint brushed help in sorting through the leaves and looking for insects.

Sorting through the leaves in the bag can be quite interesting.  There should be all sorts of tiny creatures swimming around.  A magnifying glass, tweezers, spoons, and paint brushes help in carefully sorting through the leaves to find insects.  Most of the insects will likely be less then a half inch in length so look closely!

In the ponds around Phoenix we find an abundance of mayfly nymphs, dragon fly nymphs, scuds, and fly larva (diptera or "midges").

Mayfly nymph

Scud

Dragon fly nymph

Tuesday, March 22, 2011

Preserving old fruit tree varieties

 
Over the past decades, and old retired man with no formal botanical education has carried out an extremely important biological and historical service to our civilization. Creighton Lee Calhoun Jr. has searched out and preserved 400 different varieties of apple trees protecting them from extinction.  Why is this important you may ask?  Well, about 100 years ago there were 18,000 different varieties of apples and today there are only 3,000 remaining.  The rest are either extinct or are lost in some old orchard or farm somewhere.  There remains many lost varieties of apples throughout much of the word that need someone to find and preserve them or they will face extinction in the near future.  This is an activity that anyone can do with a vehicle, some time to search the country side, and some plant grafting skills.  The chances of someone finding a "new" or lost variety of apple is pretty good.  Apples have been grown through out the world and in all 50 states of the US.  These historical apples are often deeply rooted in family and local history.  In my personal experience I have happened across a many old "wild" apple trees on hiking excursions both in the midwest and southwest.  Reading this article makes me wonder, were some of these apple trees I came across old lost varieties?

Here is the NY Times article: He Keeps Ancient Apples Fresh and Crisp

The apple has a long, rich, and important place in the history of our civilization.  Michael Pollen has documented this history in his book and PBS documentary "The Botany of Desire".  These resources present the history of the apple, and several other plants, in an extremely interesting and accessible way.  With the knowledge of the apple in world history contained in "Botany of Desire", finding and preserving old apple varieties suddenly becomes an important part of preserving world history. I am sure the same can be done for peaches, pears, plums and so on.

Check it out at this website:  www.pbs.org/thebotanyofdesire/ 

Thursday, March 10, 2011

March garden economics update


Well the month of February was pretty similar to the month of January and we continued to make progress both dollar and calorie wise.  February continued to be cold but with no freezing temperatures.  A lot of things were far less productive due to the freeze we had at the end of January but things still produced pretty well.  Unfortunately, all but a few of my chili pepper plants are dead due to frosts.  This will significantly hurt garden production for months to come.  But not to worry, I have planted more chili plants along with egg plant and tomatoes last week.  February was also a wetter month so I had to spend less time watering but March so far appears to be a dry one.  We'll see, hopefully we get some rain!

Here are the stats:
College garden
Shell peas 26oz, $8.06
Broccoli 15oz, $2.25
Lettuce  14oz, $3.50
Chard  14oz, $4.48
Cilantro  11oz, $2.36
Turnips  8oz, $1.20
Green onions  15oz, $2.36
Total hours: 1.5
Total calories burned: 459
Calories produced: 920
Net calories:  461

$ spent: $5.67 on seeds
$ produced: $24.20
Net $: $18.53

Home Garden
Shell peas 14oz, $4.34
Radishes  36oz, $4.79
Green onions  12oz, $2.95
Broccoli  12oz, $1.80
Beets  10oz, $3.98
Chard  16oz, $5.12
Carrots  43oz, 2.15
Total hours: 1.5
Total calories burned: 459
Calories produced: 1224

Net calories:  765
$ spent: $5.67 on seeds
$ produced: $27.92
Net $:  $22.25

Totals since October 2010
College garden: 
$ Totals: -$19.89+18.53=-$1.36
Total hours worked: 10.75
Calorie totals:-449+461=12

Home
$ Totals: -$12.16+$22.25=$10.09
Hours worked: 13.25
Calorie totals:-1120+765=-355

So we are finally at the breaking even point.  Why has it taken so long to get to this point?  To be specific, cauliflower,  broccoli, and cabbage.  The cabbage may still produce a good harvest but the cauliflower and broccoli take up a lot of space and produce very little.  In-fact the cauliflower produces less then a little, it has produced nothing.  Also, a lot of the winter produce is has a relatively low value compared to summer crops such as eggplant and tomatoes.  I calculated the approximate amount of space being utilized with productive crops in both of my gardens and it came out to be about 60 square feet (for each garden), which means only about 30-40% of the garden is being used effectively.  If I would have been using that space with different crops I would have broken even months ago...  Oh-well.  After many years of gardening without much effort to be productive, this has been my first year making an effort to actually be productive.  But I sure have learned a lot about making a productive garden through this exercise.  This summer should be much better.

Wednesday, March 9, 2011

Amylase and a simple enzyme experiment

When it comes to digestion, chewing is the obvious starting point.  Less obvious however are all the enzymes contained within our saliva that also aid digestion.  Enzymes simply put are chemicals that aid the breakdown of substances, or cause a certain chemical reaction to take place.  In the case of saliva, a particular enzyme called Amylase aids the break down or digestion of carbohydrates and starch, turning them into sugars.  Part of the function of chewing is not only to break our food into smaller pieces but also to mix food thoroughly with amylase so our food is digested more efficiently.  We may have consciously experienced the effects of amylase when eating starchy or carbohydrate rich food and notice that the food becomes slightly sweeter after chewing a while.  This sweet taste is a result of amylase breaking down carbohydrates or starch into sweeter tasting sugars. 

We developed a simple lab experiment demonstrating the effects of amylase that anyone can do with some basic equipment.  This is probably an experiment that others have developed, I just haven't come across it before.  All that is needed is a test tube, chlorine free water, saltine crackers, potassium iodide, and spit.  Tap water can be de-chlorinated by letting it set out for 24 hours and potassium iodide (IKI) and test tubes can be purchased on-line. 

Here are the steps to this experiment:
1. Crush up part of a saltine cracker into a fine powder.  You don't need much, only enough to cover the bottom of a test tube.  (this imitates the effects of chewing)
2. Place the crushed cracker in the bottom of a test tube, you only need enough to cover the bottom.
3. Add an equal amount of de-chlorinated water to the test tube and mix thoroughly.
4. Add one or two drops of potassium iodide (IKI) to the water-cracker mix and mix again thoroughly.  At this point much of the cracker should turn a brown color.  This is a result of the IKI staining starches in the cracker brown.
5. Double (or slightly more) the total volume in the test tube with saliva.  Yes, just let some spit accumulate in your mouth and then spit into the test tube.
6.  Mix and wait to see what happens.

Cracker ground up into fine powder.  A small amount like this works best.  Too much cracker makes the experiment work a lot slower.
Cracker with de-chlorinated water added. 
Cracker and water with an added drop of potassium iodide (IKI).  Notice the darker appearance which is the result of IKI staining starch brown.
Saliva added to the above mixture and let sit for about five minutes.  The amylase in the saliva breaks down the starch into sugar.  When the starch disappears the IKI no longer stays brown but instead clears up.  The lighter color indicates the starch has been digested by amylase in the saliva.  By waiting even longer the solution would clear up even more as more starch is digested into sugar.
In the above experiment, as amylase within the saliva breaks down starch into sugar the brown color disappears.  This experiment can be modified to see if heated or cooled saliva will still make the starch disappear.  Chemicals such as vinegar or baking soda could be added, or other foods tested out.

Thursday, March 3, 2011

The secret life of plant roots

A simple container used to observe plant roots.  This was just an old broken aquarium that we had on hand.  I simply drilled holes in the bottom for drainage, filled the aquarium with vermiculite (though any potting soil mixture would probably work), and planted a seed next to the glass.  The aquarium is wrapped in aluminum foil to prevent light from accessing the soil and roots, thus algal growth on the aquarium wall is prevented.

A more close up picture of roots growing from a squash seedling in the root viewing chamber.


For quite sometime I have been fascinated with plant roots.  They secretively hide underground yet have such obviously huge influences on how and where plants grow.  For years I have been observing how plant roots grow.  I have dug up a number of plants which is way more work than I really want to do.  I have also observed roots where they have been exposed by road cuts and stream banks.  But recently I made this rooting chamber which is much easier then digging or searching for exposed roots.  (Other people have probably done this type of thing before, I just haven't found any examples of it.)  This little project is so simple anyone can do it, yet its simplicity lends anyone to being able to discover all kinds of new and valuable scientific information.

Here is what you need to do:
1. Find an old aquarium, one that you can drill holes in the bottom will work best.  If you can't find an aquarium any clear container with vertical sides should work.
2. Drill holes in the bottom for drainage.
3. Fill with potting soil of some type.  In my example above I used vermiculite.
4. Plant a seed you are interested in right next to the glass.
5. Wrap outside of root viewing chamber with aluminum foil to prevent light from accessing the soil.  This will prevent algal growth on the chambers side which would prevent you from seeing the roots.
6. When you want to see how your roots are growing, remove the aluminum foil and record your observations.

Another idea I have had is to plant a seed between two pieces of glass that are only 1/2 inch apart or so.  This would force the roots to grow right up against the glass instead of spreading out through the aquarium, possibly making for better root observation.

All kinds of valuable plant projects can be done by anyone using this simple root viewing chamber.  Obviously, different species of plants will have different rooting patterns.  Different plant species could have either shallow or deep roots, one or more taproots or none, fine or thick roots, extensive or few roots, fast or slow growing, or any combination of these traits.  Understanding these root facts can help us know how to grow plants in the garden or landscape, or they can help us understand why certain plants grow in certain locations in nature.  More complicated projects could be done by identifying how plant roots are affected by interactions with other roots or with fungi.  By identifying how plant roots grow you can begin to make very valuable scientific decisions and explanations for the garden, agriculture, landscape, ecology, or just general scientific understanding.  There is a lot of potential that anyone can tap into with a little work.


Recently I read the book, "Roots Demystified" by Robert Kourik.  This is a pretty easy read with lots of extremely valuable information on gardening and landscaping with roots in mind.  The book will give you a greater understanding and appreciation for the unseen root portions of plants.  Roots, for most plants, collect nearly all moisture and nutrients the plant needs to flourish.  Therefore, our green thumb is dependent on our knowledge of plant roots.  So green-up your thumb by adding to your knowledge of plant roots!

Wednesday, March 2, 2011

Native plant societies and my recent article

I recently published a short article in the Arizona Native Plant societies biannual publication "The Plant Press".

Here is a link to the publication:  www.aznps.com/documents/2011.03.PP.pdf 
My article can be found on pages six and seven of The Plant Press.  The article is titled "Ephemeral drainages: the quiet riparian plant community".  Ephemeral drainage is simply a fancy word for "dry wash".  This article is a short overview of the physical and botanical aspects of ephemeral drainages in the Sonoran Desert.  Below are the two pictures I took of a Sonoran Desert ephemeral drainage near my home for this article.

A deeply incised drainage close to mountainside of the White Tank Mountains.  These deeply incised drainages are typically inhabited by Palo Verde, cacti, and Brittlebrush.


A shallow braided channel much further away from the White Tank Mountains.  These shallow drainages often have more water flow through them during flash floods and as a result are inhabited by Acacia's, Creosote bush, Mesquite, and Ironwood.

This brings me to my next point: Native plant societies are a great way for someone to learn basic botany and natural history of a state or region.  I have been involved with the Arizona Native Plant Society for a number of years now.  Through societies like these a person can come in contact with scientists, experts, go on field trips, listen to speakers, and find materials, all of which will aid in educating someone on botany and natural history.  If you are interested in learning these things do a Google search for plant societies in your state.

On a related subject, in future postings I am planning on doing a series on the natural history of the Sonoran Desert.  This will involve a number of posts explaining Sonoran Desert geology, soils, hydrology, climate, plants, and animals.  I am also planning on doing a series on foraging for wild foods in the Sonoran Desert.  My foraging project is hopefully going to involve how to gather and eat Mesquite, Acacia, Palo Verde, Cholla, Prickley Pear, Saguaro, Wolfberry, Ironwood, and others.