Wednesday, January 26, 2011

Science and the evolution of food pyramids?

It is interesting to examine the development and changes made to the USDA Food Pyramid over the last 20 years.  The first food pyramid today has been criticized as non-scientific and overly dependent on industrial interests.  While this pyramid is not the greatest, it still isn't bad, and most Americans diets would greatly improve by eating according to it. 
The first USDA Food Pyramid introduced in 1992.  This pyramid has been criticized as today as no longer having a scientific basis and being overly influenced by industrial interests.
Due to changes found in dietary research the USDA introduced the New Food Pyramid in 2005.  The new pyramid is significantly better than the old but still is criticized as being influenced by industrial interests in some regards as opposed to scientific knowledge. 

The new food pyramid has fewer grains and specifies whole grains, significantly increases plant oils (thus distinguishing between saturated and unsaturated fats), decreases meats and dairy, increases fruits and vegetables,  increases/adds legumes, increases/adds nuts and seeds, and so on.  There are a lot of huge and important changes in this food pyramid.  Criticism of this pyramid has come in regards to there being still too many servings of meat and dairy products (Yes the critics have a strong scientific basis).  Based on the scientific research though this is a greatly improved food pyramid despite criticism and again Americans would do very well to eat according to this pyramid.  In my opinion, and their is significant research to support this, a myriad of health problems in the USA would largely disappear if most Americans ate according to the pyramid.  Unfortunately, most Americans eat with this pyramid upside down by eating large amounts of meats and dairy products and very few fruits, veggies, and whole grains.

In my opinion there are probably several possible scientific based food pyramids that are very healthy.  And obviously there are many thousands that are not healthy and not scientifically based.  In some of my readings and research I came across several interesting ones which I believe are scientifically shown to at least be as healthy as the original 1992 Food Pyramid. 

Dr. Weil's Anti-inflamitory food pyramid.  As far as I can tell this is a very scientific based healthy food pyramid.
Okinawa Diet Food Pyramid.  Based on research of the diet of the Okinawa people who are well known to have some of the longest lifespans in the world. 
Dr. Weil's and the Okinawa pyramids are both scientifically based and bare a lot of resemblances to the USDA New Food Pyramid.  I also found all kinds of other food pyramids such as the Bunny Food Pyramid which I don't suggest for people but only for bunnies (As it was designed for).  Interestingly though there are some similarities in the bunny pyramid to the people pyramids above.

The Bunny Food Pyramid.  Suggested for bunnies not people.  I don't know any person who can eat or wants to eat grass or alfalfa. 
As far as biology goes, our diet is about as practical as it gets.  We all have to eat and our health is largely determined by our diet.  We should all seriously consider what we eat.  Well, unless you are this guy... Then your diet doesn't matter at all...

Ok, you're right, I am convinced this is a hoax.  Apparently not everything on the internet is true...

Tuesday, January 25, 2011

Stinging nettles are actually useful?!?!


Growing up in the Midwest I learned very quickly in my camping, fishing, and hiking excisions what stinging nettles where and avoided them as much as possible.  I found them much easier to identify and avoid then poison ivy which I managed to get every summer for four years in my childhood.  After those four years I learned my lesson and haven't had is since.  But for all the effort I and others put into avoiding stinging nettles I never guessed some people would actually find them useful.  In-fact, some people find them one of the most useful plants available.  Weird but true.

In looking into this I came across the book "101 Uses for Stinging Nettles" by Piers Warren.  The book is pretty interesting.  Some of the more interesting uses in the book are: fertilizer, insecticides, tea, all kinds of food uses, fiber for rope and clothing, and numerous medical uses.  A lot of these 101 uses are folk lore but a lot are also based on actual uses that have been around for centuries.  The usefulness of this plant appears to me to be pretty amazing.  The book prompted me to purchase nettle seeds which I will be planting in my garden this spring so I can test out a lot of these different uses.  So in coming months, as the nettles grow, I will post the results for some of these nettle uses.  I'll test them out to see if its true.

Here is an article on nettles I came across a while back.  Apparently nettle ferments and new publications on nettles are somehow illegal in France (according to this article).  Weird.

Here is another article on nettle ferments:  Nettles to the rescue


Stinging nettle plant (Urtica dioica)

Stinging nettles typically grow in areas of very wet soil and form dense thickets like this.

Wednesday, January 19, 2011

Bare root fruit trees

Bare root apple tree.  Note the fine roots.  In general, bare root fruit trees with an abundance of fine roots will do much better then trees with a few large roots or very few roots at all.  Also note the white band just above the roots in the center of the picture.  This white band is where the apple scion (stem) is grafted onto a root stock system.  The roots should be planted to a depth just below this white band.

Several years ago I started planting a variety of bare root fruit trees and vines.  A bare root tree is simply that, when purchased the tree doesn't come in a pot of soil but rather comes with the roots bare and wrapped up in sawdust or something else that will keep the roots moist.  At first I was a little scared that everything I planted would die.  However, I have now planted many peach, apple, plum, grape, blackberry, and persimmon trees successfully, not one of which have died.   I have found bare root trees easier to handle than potted plants, you just have to be a little more delicate with their root systems.  Fruit trees are probably the easiest and cheapest way to garden.  For several hundred dollars you can plant a relatively large orchard and never have to put any money into it again.  The hardest work is also up-front with planting these trees.  But once the trees are planted the hardest work left is harvesting and pruning.  Fruit trees are a simple way to add value and productivity to your property.  Here are some basic guidelines to growing your bare root trees.

Chilling hours: It is important that you select trees that have fewer chill hours then your local climate.  Chilling hours are the number of hours a location has with temperatures between 32 and 45 degrees.  These hours are needed in order for a fruit tree to bud, flower, and produce fruit.  In Phoenix we have less then 400 chilling hours each winter so we must select trees that have 400 or fewer chilling hour requirements.  It also may be helpful to look at USDA plant growing zone information when selecting trees.   If  you select trees with too many chilling hours you may get either no fruit or inconsistent fruit.

Root stock:  There are many types of root stocks available for all the different types of fruit trees.  These stocks have a variety of different effects on the growth of trees or the soils they are adapted to.  Dwarfing stocks are often popular but I have found them difficult to deal with in desert conditions.  For this reason, I favor seedling or semi-dwarfing root stocks, they seem to deal with drought conditions far better then dwarf stocks. 

Site selection:  Sites generally needs at least six hours of direct sunlight a day.  Also, select a site were it will be easy to water if needed.

Planting: Dig a hole slightly larger then root ball and plant to just below graft point or where tree was originally planted.

Pruning: After planting prune tree to 18 to 24 inches.  This allows for more roots to feed less stem and leaf area which is very important for aiding establishment of the tree.  This is especially true in desert areas.  After the first year prune to the desired shape in late summer and while the tree is dormant in the winter.  You can prune your trees to fit the space they are planted in.

Here are some other resources I have found on bare root fruit trees:

Friday, January 14, 2011

More on compost tea fertilizers

Last week I posted the basics of making your own compost tea.  Well I just came across an excellent Mother Earth News article discussing how to make and use compost teas.  I personally have used several of these techniques with success.  As I stated in my previous post on compost teas I always try to error on the side of making teas that are too diluted rather then overly concentrated.  By diluting teas plants and soils are protected but concentrated teas can damage them as well as possibly cause pollution.

Anyway, here is the article: Free, Homemade Liquid Fertilizers

Monday, January 10, 2011

Useful and free spent coffee grounds

Spent coffee grounds

Spent coffee grounds are one of the most useful, abundant, and widely available waste streams in America today.  For those who do not know, spent grounds are simply used coffee grounds.  Unfortunately, home coffee makers, offices, cafeterias, and coffee shops dispose of almost all of them every day.  There are several great biological uses for spent coffee grounds.

Biologically speaking, grounds are excellent life supporting material.  They are over 90% carbon, 5% nitrogen, and 0.5% potassium, and 0.5%  phosphorous.  All of which is biologically available.  PH is around 5.5.  If spent coffee grounds are left in the open air for several days, numerous molds of different colors begin to colonize the surface.  I have seen blue, green, white, gray, and yellow molds growing on spent grounds.

Here are some of the ways I have used spent grounds:

Garden soil amendment: Simply mix a small amount of grounds in with the soil.  From my experience there is no reason to mix in more then about 10% grounds into the soil.  Higher percentages of grounds can actually be harmful to the soil and plants by lowing the pH too low or by introducing too much nitrogen.

Compost: Adding coffee grounds to a compost pile lowers the pH and raises nitrogen.  Both speed up the composting process and increases the quality of the final compost.  However, I wouldn't make a compost pile more than about 20% coffee grounds.  Too much nitrogen from the grounds can again harm plants and make the compost process difficult.

Mulch: Spreading coffee grounds on the surface of a garden, or around other plants works well as a fertilizer and is a slight bug deterrent. 

Compost tea: Add into compost tea to lower pH and raise nitrogen.  Some people have found that by making a tea with only spent grounds, the tea can be dumped on plants to prevent and to "cure" insect infestations.

Growing mushrooms: Spent coffee grounds grow oyster mushrooms very quickly and successfully.  In-fact some people have started businesses doing this.  Check out Back to the Roots for a very cool example of a spent coffee grounds mushroom farm.


Fungi spawn substrate:  Not all fungi will form mushrooms on coffee grounds though.  But, even if mushrooms will not form for a particular fungal species, the mycelium will still grow so grounds can be used as a spawn substrate.  

Worm food: Add spent grounds into a worm bin to make worm castings.   I have never done this but would guess to add no more then about 30%.  From what I hear worms absolutely love coffee grounds.

A few years ago you could stop at any Star Bucks and they would have coffee grounds set aside for people to take for free.  Well apparently not enough people picked up these grounds so now you have to ask them to set them aside for you.  I have asked many different coffee shops and cafeterias to set aside grounds for me and they are all very willing to do it.  You may have to explain yourself to them as this may seem very weird and confusing to them. So, find a coffee shop and ask if they will set grounds aside for you.  I am sure, that soon enough you will have more grounds then you know what to do with, and all for free.

Thursday, January 6, 2011

Fungi amazi

Last summer I came across Paul Stamets TED lecture "6 ways mushrooms can save the world."  To say the least, I found the lecture fascinating and immediately started working on several projects centered around fungi.  These projects have and continue to involve the following: growing oyster mushrooms, mycorrhizal plant associations, composting with Hypsizygus ulimarius, mushroom/garden companion planting, and various other mushroom growing techniques.  I will be posting some of these experiments in the future.

Stamets company is Fungi Perfecti and can be found at this website: www.fungi.com/index.htmlFungi Perfecti is an extremely interesting company centering around growing and using fungi for very practical applications.  A lot of what they do is very cutting edge.

I have also read two of Stamets books: "Mycelium Running" and "Growing Gormet and Medicinal Mushrooms".  Both of these are great books for learning about fungi and their practical applications in nature, agriculture, health, and economics.  They really opened my eyes up to a lot of basic but very meaningful experiments the average non-scientist could do.  There seems to be a lot of potential for non-scientists to contribute significant information to the scientific world.

Here is the video of Paul Stamets TED lecture "6 ways mushrooms can save the world". This lecture is largely based off of his book "Mycelium Running".

Growing mushrooms conclusion

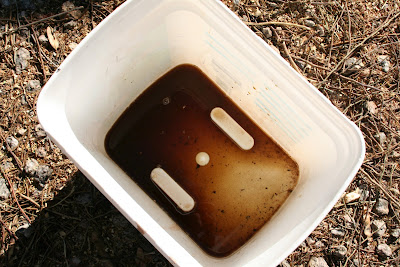
Two months ago I began growing oyster mushrooms on coffee grounds.  Here is that initial post.  I simply mixed some oyster mushroom spawn with spent coffee grounds I got from the school cafeteria.  Well, things went pretty well but not perfectly.  The mushroom mycelium grew quite well on the coffee grounds and I was able to grow quite a few mushrooms.  I had one major problem though.  Being that I was growing them in the desert the mushrooms almost always dehydrated before they were a few inches tall.  So I ended up with tons of tiny shriveled-up mushrooms.  I tried several methods to increase the humidity, none of which worked adequately.  When I enclosed the entire bucket in plastic to preserve moisture the fungi didn't have enough oxygen so deformed mushrooms formed.

An abundance of small, dehydrated oyster mushrooms growing on coffee grounds.  The white surface is mushroom mycelium.  Mycelium are sort of like mushroom roots.

Same bucket two months ago.  The black coffee grounds quickly turned white as mycelium grew.
I do have this to say though.  The few mushrooms that I did get from the bucket were by far the best I have ever tasted.  I plan on trying to grow mushrooms in the near future again.  This time however I will have to create some sort of terrarium that holds in the moisture but also allows for air exchange.

Wednesday, January 5, 2011

January garden economics update

October 2010

November 2010
December 2010
January 2011
As you can see from the pictures above, the garden has made a lot of progress in the past month.  (December Garden Economics update) Lettuce, chard, radishes, beets, peas, and others are all just barely starting to produce.  The past month has been great for gardening.  We have had good temperatures which makes for great growth.  There were three days of freezing temperatures that did slow some of the growth but nothing too drastic.  The freezing temperature did kill off my chili peppers however, which is a major setback.  Our dry conditions changed to wet mid-December so we haven't had to do any supplemental watering for several weeks.  In two rainfall events we have totaled over 1.5 inches of rain.  I'm hopeful the wet conditions will continue.  As for the weather forecast it looks like we will have continued great growing temperatures and maybe some rain.  But we'll see.

Here is what was produced this month:
Phoenix College garden
Easter egg radishes 26, 18 oz, $2.15, 90 calories
Cilantro  about 4 bunches, 7 oz, $1.96, 49 calories
Lettuce 12 oz, $3.98, 85 calories
Chard 14 oz, $4.36, 77 calories
Shell peas 2 oz, $0.62, 24 calories
Time spent gardening: 1.75 hours
Calories burned: 278
Expenses: trellis for peas $5
$ Totals: $13.07-$5.00=$8.07
Calorie totals: 325-278=47

Home Garden
Chili peppers 8 oz, $1.50, 95 calories
Chives 10 oz, $9.45, 50 calories
Chard 8 oz, $2.49, 44 calories
Radishes 6, 4 oz, $0.50, 20 calories
Shell peas 3 oz, $0.94, 36 calories
Green onions 7 oz, $0.86, 35 calories
Time spent gardening: 2.0 hours
Expenses: $0 (already have trellises in place, made from free materials)
Calories burned: 318
$ Totals: 15.74
Calorie totals: 280-318=-38

Season totals:
College garden
$ Totals: -$56.52+$8.07=-$48.45
Hours worked: 5.75+1.75=7.5
Calorie totals:-1540+47=-1493

Home Garden
$ Totals: -$49.66+$15.74=-$40.38
Hours worked: 9.5
Calorie totals:-2049-38=-2087

So we are still in the hole both dollar and calorie wise.  I expect we will catch-up dollar wise within the next month or so but we'll see.  I am not sure we will catch-up calorie wise considering we are not growing calorie dense produce such as corn or potatoes.  Already I am seeing ways of improving my plantings next year.  For example, slower growing crops such as broccoli can be inter-seeded with fast growing plants such as radishes.  Smaller crops such as green onions can be inter-seeded with larger crops.  Dense plantings make the most sense, I will continue with square foot style planting but also intersperse certain plants that have different space requirements.  I also need to figure out cheaper ways of pest control, and possibly do some more seed saving.  All of these things would save a lot of money up front and improve productivity.  I will post the next update in February.

The incredible, amazing compost tea

A small amount of compost tea in the bottom of a bucket.  At its simplest, compost tea is simply the liquid drained out of compost and used as a sort of fertilizer.

Compost teas seem to be one of the latest things in organic gardening.  At their simplest compost teas are the liquid drained out of compost and used as a plant fertilizer.  There are many benefits to using compost teas which include delivering nutrients and beneficial microbes to plant leaves and roots.  The beneficial microbes can protect the plants from pests and produce healthy living soils. There are potentially hundreds of different ways to make compost teas.

The most basic:
1. Drain liquid out of compost
2. Dilute liquid in water
3. Apply to plants by spraying on foliage and soil

I have used the above basic compost tea many times and it has been extremely effective.  Plants will often respond to it almost as fast as they would to chemical fertilizers and the benefits generally last longer then chemical fertilizers.

Another common type of compost tea:
1. Place compost filled burlap sack in a bucket of water.
2. Oxygenate the water by adding fish bubblers to the bucket or by swishing around the burlap sack every few hours.
3. Continue to do this anywhere from a few hours to a few days.
4. Remove burlap sack and apply tea to foliage and soil

There are many variations of the above.  One of the more common ones involves adding a few tablespoons of black strap molasses to the bucket of water.  The molasses adds nutrients to the tea and aids the growth of beneficial organisms.  Though I have never tested this, compost tea made with molasses apparently is a strong deterrent to ants.  My latest batch of compost tea involved soaking compost in water for several hours and adding Mycogrow, which is a concoction of fungal spores.  Fungal spores are like seeds for fungus.  The Mycogrow spores are for mycorrhizal fungi that infect plant roots, aiding water and nutrient uptake, thus benefiting the infected plant.  I'll report back on this if I find something interesting, I have several fungal blog posts in the works.

Bag of Mycogrow spores from Fungi Perfecti.  I mixed this bag of fungal spores with some compost tea a few weeks ago and applied them to my garden. 
Not all farmers/gardeners agree on how compost tea should be made, some say with molasses, some say without.  Some say use small dilutions others large.  The key is experimenting to figure out what works for your situation.  Before you apply a new type of compost tea to many plants apply it to a few leaves first and observe the results over the next few days.  This prevents you from harming your entire garden if you happen to produce a 'bad' tea.  As with any fertilizer though, compost tea should not be over applied as it can burn plants and cause water pollution.  It is however a quick, easy, cheap, and effective solution to chemical fertilizers.

For more information check out these articles:

Tuesday, January 4, 2011

Sowing seeds in anticipation for rain

Beet sprouts.  In the desert keeping seed and seedlings moist can be difficult.  It can take a lot of water and time to keep prevent them from dying before they are more established.  This method overcomes this problem, saving water and time.


Three falls ago I was planting my garden with my two year old son trying to get him not to destroy it.  In an attempt to occupy him I gave him some extra radish and beet seeds for him to "plant".  His version of planting was taking a handful of seeds and throwing them on the ground in the garden.  Not thinking anything would come of them I simply covered the seeds with dirt and forgot about them. Total time required: about two minutes (maybe).  It didn't rain much of anything for one to two months after this and I didn't water any of these seed.  When a large rain event did finally come all of the seeds my son "planted" sprouted within a few days and we had plenty of radishes and beets in a month or so.  All with only a few minutes of work.  His careless planting method has proven to be quite effective now for three years for radishes, beets, and green onions in the desert.  I am sure other plants can be grown this way, I just haven't tried any other ones. 

Here is the basic method:
1. Take a handful of seeds and throw them on the ground.
2. Gently rake them in or cover them.
3. Wait for rain.
4. Water as needed after rainfall germinates them.
5. Thin and harvest as needed.

One of the most difficult challenges in the desert to overcome is how fast things dry out.  This is especially a danger for seeds and seedlings which can easily be killed by dehydration in only one day if not kept adequately moist.  By sowing seeds and waiting for rain the problem of constantly watering and monitoring seedlings is avoided and the workload is decreased by almost 100 percent.  I have also been able to conserve up to 100 percent of water (depending on how much rain we get) for some crops of radishes and beets using this method.  I would like to grow other plants this way but haven't done it yet.  I suspect it works best with short season plants that quickly germinate, such as radishes that mature in about 30 days.

Mistletoe: the kissing parasite

For many years now, every time I see mistletoe hanging-up around Christmas time I find it sort of humorous.  Most people think of mistletoe as the "kissing" plant, I find it as a complex parasitic organism.  Yes, mistletoe is a parasite that is pretty common in western forests and deserts.

A clump of mistletoe growing in the center of a juniper tree.

However, parasitism is only the beginning of the story.  Even more interesting is how the mistletoe got on the tree in the first place.  Mistletoe produces red or white berries which are possibly toxic to humans but extremely tasty and nutritious to birds of all types.  Many types of birds will gorge themselves on the berries and as a consequence carry the seeds to new locations.  In-fact, a southwestern bird known as the pheinopepla was found to eat around 1100 berries a day when berries were available.   Eating all those berries means a lot of seeds being transporting to new host plants.

Phainopepla, found to eat around 1100 mistletoe berries per day when berries were available.
Seeds are transported in the birds digestive tract but also on their beaks.  Mistletoe berries are covered with a very sticky substance causing seeds to stick to the birds beak, which the birds wipe off onto trees and shrubs where a new plant can grow.  The sticky seeds also pass through the digestive tract of birds and when defecated on a plant can germinate and parasitize the new plant very quickly.

Desert tree severely parasitized by mistletoe.

From all this you may think that mistletoe is a severe problem taking over and destroying our forests, but things to not always as they first appear.  In many cases mistletoe actually benefits the forest.  First of all the berries provide food for bird species that live in the area, increasing the number of birds and number of bird species an area can support.  Secondly, some trees, such as the junipers, when parasitized actually produce more of their own seeds.  This also increases the food available for birds and animals, thus supporting greater numbers of animals and greater diversity as well.  Parastized trees also form deformed 'witches brooms' which many birds and animals prefer for nesting sites.


So the next time you see mistletoe hanging in the doorway wow your "kisser" with this knowledge and they may never look at mistletoe in the same way.  They may not want to kiss you after their new found knowledge either though..

Monday, January 3, 2011

Happy New Year! Weight and the holidays (this post may make you hate me)

 
I did a little research on how large the average holiday meals are calorie wise and what I found was pretty interesting.  Based on several sources, the typical Thanksgiving and Christmas meals involve eating anywhere from 2000 to 6000 calories above the daily recommended caloric intake.  The average appears to be about 3500 extra calories for each of these meals.  Being that one pound of body fat is about 3500 calories, this means for each one of these meals a person, on average, gains about 1 pound.  On the bright side, the average American typically consumes fewer calories in the days after these large meals so the weight gain of one pound is typically not realized.  However, for some people it is.

Assuming the one pound of weight gain is realized by a person, what would it take for that person to loose that additional pound?   Well, one pound of body weight is 3500 calories, so in order to loose it 3500 additional calories would have to be burned.  If a person continues to eat the average 2000 daily calorie diet and chooses to exercise to burn off the additional calories, how much exercise would it take?  Jogging at an average pace burns about 500 calories in one hour.  So in order to burn off 3500 calories a person would have to jog seven hours to loose one pound!

What is the practical biology lesson in all this?  Its much easier to limit food intake rather than trying to exercise the weight off.  Before you hate me for this, remember this is a biological fact.  And remember Merry Christmas and happy New Year!